What to Check First When You Find Bathroom Surface Mold on Grout and Caulk
@drywalljournal
November 13, 2026 · 7 min read
Bathrooms are the most moisture-prone rooms in a home, and the places where mold shows up first are almost always the same: the grout between tiles and the caulk along edges and corners. These materials are porous, they stay damp longer than other surfaces, and they trap soap scum and organic matter that mold feeds on. For a homeowner, spotting dark spots on grout or a black line along the caulk is not unusual, but knowing what to check first can mean the difference between a quick clean and a bigger problem that spreads into walls or under the floor.
Why Grout and Caulk Are Vulnerable
Grout is a cement-based or epoxy material that fills the gaps between tiles. Standard cement grout is naturally porous, which means water soaks into it rather than beading on the surface. Over time, microscopic cracks form from normal building movement or from tiles that were not set firmly. Those cracks trap moisture and create a perfect home for mold spores that float through the air. Caulk, usually a silicone or acrylic sealant, is used where tile meets a bathtub, shower base, sink or wall corner. It is meant to be flexible and waterproof, but caulk degrades with age. It shrinks, pulls away from surfaces, and develops tiny gaps where water seeps behind it. Once water gets behind the caulk line, it stays trapped, and mold grows on the caulk itself and on the surface underneath. Mold Removal Boston Pros
Mold on these surfaces is often the first visible sign that a bathroom has a moisture imbalance. The mold itself is unsightly, but the bigger concern is what it points to: conditions that can damage materials and affect indoor air quality. That is why Mold Removal Boston Pros recommend checking these areas first when a homeowner notices any discoloration on tile or sealant.
What to Look for in Grout
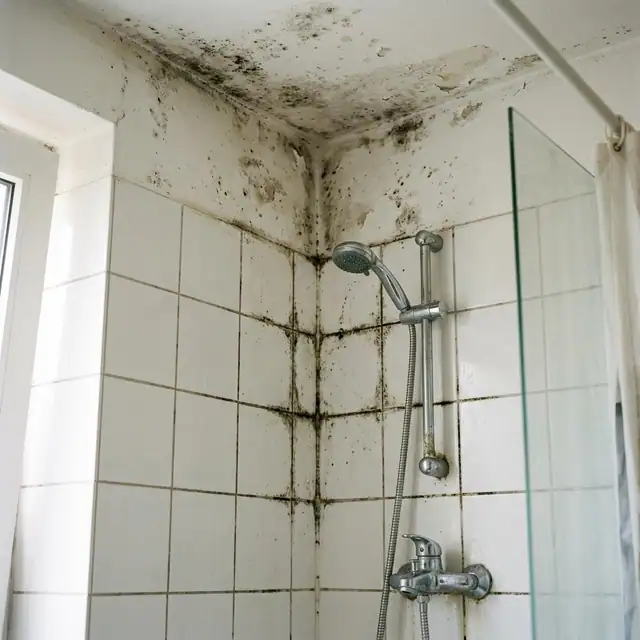
Grout can discolor for reasons other than mold. Dirt, hard water stains and soap scum all leave marks that look similar, especially on light-colored grout. The first check is whether the discoloration wipes off with a damp cloth. If it does not, it is likely mold growing into the porous surface. Run a fingernail or a plastic scraper gently across the grout line. If the surface feels powdery or crumbles, the grout has lost its integrity and moisture is sitting deep inside. That kind of damage means cleaning alone will not solve the problem. The grout may need to be removed and replaced, or sealed after a thorough cleaning.
Another check is the pattern of the growth. Mold on grout often appears as dark speckles or a continuous dark line along the joint. If you see a uniform dark stain that follows the grout line exactly, that is a strong sign of mold living inside the material. Grout that stays wet for more than a few hours after a shower is especially prone. A simple test is to shower, then wipe down the tiles and see how long the grout stays damp. If it remains wet for hours, the ventilation in the room is not removing humidity fast enough, and the grout will keep harboring mold no matter how often it is cleaned.
What to Look for in Caulk
Caulk problems are easier to spot because caulk is a solid bead. Check for any gap between the caulk and the tile or between the caulk and the tub or sink. Even a hairline crack lets water in. Press gently on the caulk with a finger. If it feels soft or spongy, moisture has gotten underneath and the sealant has lost its bond. That is a sign that the caulk needs to be removed and reapplied, not just cleaned on the surface. Black or pinkish streaks on the caulk surface that return within days of cleaning are almost certainly mold growing through the material. Silicone caulk is non-porous, so surface mold can often be wiped away, but if the caulk is old or damaged, mold can grow in the microscopic imperfections on its surface or in the gap between the caulk and the tile.
A common mistake is to assume that scrubbing the caulk with bleach will fix the problem. Bleach kills mold on non-porous surfaces, but it does not penetrate caulk that has pulled away from the tile. The water that feeds the mold stays behind the caulk, and the mold will come back. The real fix is to remove the old caulk, dry the area thoroughly, and apply a fresh bead of high-quality bathroom caulk that bonds tightly to both surfaces.
What the Condition of Grout and Caulk Tells You
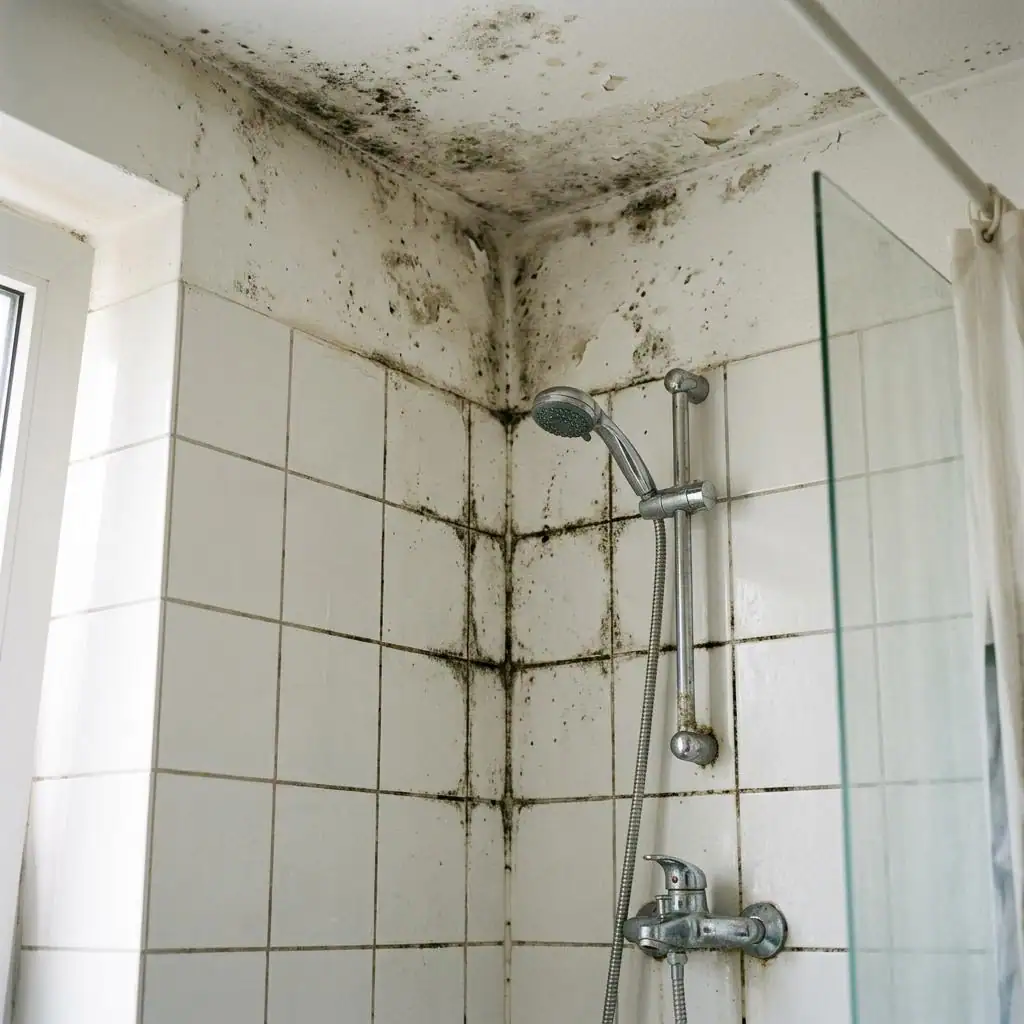
The state of the grout and caulk in a bathroom is a window into how well the room handles moisture. If the grout is intact and the caulk is firmly bonded, the bathroom is probably well-ventilated and dried out regularly. If both are failing, it suggests that the room has chronic high humidity, poor airflow, or a lack of routine maintenance. Those conditions do not just affect grout and caulk. They can lead to mold growth on walls, inside cabinets, and even inside the wall cavity if moisture finds a path through gaps in the tile or sealant.
Homeowners should also check for soft or spongy areas on the wall or floor near the affected grout and caulk. Press on the wallboard next to the shower or tub. If it feels soft or gives slightly, water has likely penetrated the wall behind the tile. That is a more serious issue that requires opening the wall to dry out the framing and replace damaged material. Catching it early, when the only visible sign is mold on the caulk, can save a lot of repair work later.
Practical Steps for Homeowners
Start by cleaning the affected areas with a product specifically for bathroom mold. Avoid mixing cleaners, especially bleach and ammonia, because that creates toxic fumes. Scrub grout with a stiff brush and rinse well. For caulk, wipe the surface with a cloth and a mild cleaner. If the discoloration returns within a week, the material itself is compromised. In that case, the next step is to remove and replace the grout or caulk. For grout, that means using a grout saw or rotary tool to take out the old material, then applying new grout and sealing it afterward. For caulk, cut out the old bead with a utility knife, clean the gap, let it dry fully, and apply new caulk. A caulk finishing tool or a wet finger can smooth the bead and ensure a tight seal against both surfaces.
Ventilation is the other half of the solution. Run the bathroom fan during and for at least 20 minutes after every shower. If there is no fan, open a window. A squeegee on the tiles after showering removes the bulk of the water that would otherwise sit on the grout and caulk. Towel-drying the caulk bead and the grout lines once a week keeps them dry enough that mold cannot establish a foothold. For bathrooms that stay humid despite these efforts, a small dehumidifier can make a real difference.
For homeowners who find that the grout or caulk is failing repeatedly, or who suspect that moisture has gotten behind the tile or into the wall, a professional assessment is a sensible next step. That is where a service like Mold Removal Boston Pros comes in. They inspect the bathroom for visible growth, hidden moisture, damaged materials and ventilation problems. Addressing the root cause, rather than just cleaning the surface, is what keeps mold from returning. Grout and caulk are the most common entry points, but they are also the most straightforward to fix when caught early. The key is to check them first, understand what the condition tells you, and act before the problem spreads beyond the tile line.